Welcome to our first Memorable Season's Blog Hop challenge.
All you need to do is go to the blog from each DT member and find a challenge requirement. Once you have all 4 requirements, you can create a layout, post it in the gallery and link it up in the forums by the end of the month.
Kristin
Alison
Charity
Louise
Just to inspire you, here is a card from DT member Alison posted earlier this week in our card exchange. I hope you are playing along with that as well.
Have fun!
Thursday, March 5, 2015
Monday, February 23, 2015
LOTW 2/23: Dria
So in love with this page so I had to pick it for layout of the week!!!!
Some wonderful "Eye Candy" for this Monday!!!!
Some wonderful "Eye Candy" for this Monday!!!!
Thursday, February 19, 2015
2/19 Kristin's Love Challenge
One of my favorite destinations is San Francisco ...there are so many things to do in that wonderful town ...so "I left my heart in San Francisco" .....

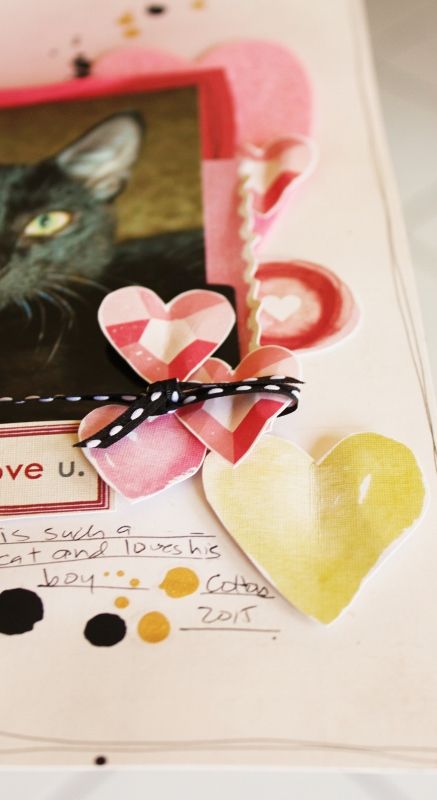
Please add 8 hearts to your project!!! So fun ...can you feel the love!!!
Had a hard time getting a good picture of this wonderful paper from Crate Paper "Kiss Kiss " Collection with the heart background ...I need like 4 more pieces of this paper!!! I just love how the Fancy Pants pink alphabet stickers just blend into the background

And then here is my close-up:

The rules:
*Create a new layout or 2 cards for this challenge.
*Upload your creation to the gallery & link back here by the deadline of February 28

Please add 8 hearts to your project!!! So fun ...can you feel the love!!!
Had a hard time getting a good picture of this wonderful paper from Crate Paper "Kiss Kiss " Collection with the heart background ...I need like 4 more pieces of this paper!!! I just love how the Fancy Pants pink alphabet stickers just blend into the background

And then here is my close-up:

The rules:
*Create a new layout or 2 cards for this challenge.
*Upload your creation to the gallery & link back here by the deadline of February 28
Friday, February 6, 2015
Kristin's first Romantic Challenge!!!
My first Memorable Seasons Challenge!!!
Here is my mood board for my Romantic Destination ....as you can tell I like to relax and sit back and enjoy the beach!!!
Here is my first destination sunny fun filled California ...so many fun things to do there!!!
Your first Challenge is to use these colors from this Mood Board ...have fun with these colors ...and you can add white, black and kraft to your project!!!Here is a link to the challenge:
memorable seasons

And then here is my example:
Here is my first destination sunny fun filled California ...so many fun things to do there!!!
Your first Challenge is to use these colors from this Mood Board ...have fun with these colors ...and you can add white, black and kraft to your project!!!Here is a link to the challenge:
memorable seasons

And then here is my example:
And then here are the close-ups:
The rules:
*Create a new layout or 2 cards for this challenge.
*Upload your creation to the gallery & link back here by the deadline of February 28
+ And I will be sending out a little prize to four people at the end of the month!!!!
Tuesday, December 16, 2014
Winter Paper Collections
Have you stopped by the Memorable Seasons store lately?
Lots of fun winter papers are listed!
My favorite is Candy Cane Lane by Bo Bunny.
The Pink Christmas Trees, the Yellow Stars, and that Advent Paper...
~ Sipping Together ~
Come on over to the forum to see samples of the other collections available in the store.
Check my blog Scrappin' Chaos for a quick look at the sketch I used for this layout.
Scrap On!
~charity~
Sunday, November 30, 2014
DT Call
Memorable Seasons is looking for 2 new DT
members to work with the 2 continuing DT members.
Here are the details for our DT call and we would love for you to apply and also share the information wherever you are able.
Memorable Seasons http://www.memorableseasons.com/ is holding a Design Team call until January 4, a decision will be made by January 20, with the new team starting February 1.
Memorable Seasons is an on-line scrapbook store, gallery and message board dedicated to documenting all the seasons in your life. We are searching for 2 designers to complete our team.
To apply, please email the following to scrapbookinglouise@comcast.net:
1. Your full contact information: name, phone number, email
address, and mailing address. Include your message board name if you sign up
for the gallery under a name other than your given name.
2. Links to your online gallery, blog and/or resume, if available
3. A short paragraph about why you would like to be one of our designers and what you would add to our team.
4. A list of your current scrapbooking commitments – other DT work, etc.
5. Attach the following items, photos or scans of 3 total projects to include:
• your favorite layout
• one card
• one altered item or an additional layout
Restrictions: Only US addresses at this time. Also, we prefer those who are not currently on a design team affiliated with an online store (etsy’s are fine). Manufacturer, sketch site or kit clubs with no stores attached are okay.
Design team members will receive a monthly kit sometime after the 10th of the month. You are required to create and share at least 4 projects using mostly the items in your kit on the 1st of each month. One of those 4 projects must be a card. Other requirements include choosing a layout of the week, issuing DT challenges, posting to the blog, and FB on a rotating basis, active participation on the message board, on line crops, and any other promotions that may come up. Term is 9 months. If selected to join our team, your 9 month term will begin in February 2014.
Wednesday, November 19, 2014
Bottle Cap flowers
The Sweater Weather and A Perfect Autumn collections meld so perfectly that I've throughly enjoyed mixing and matching.
Stop by the store to get yours!!!
~ Grateful ~
My blog Scrappin' Chaos has a list of supplies used in this project.
The gorgeous flower on this card was made from scraps and household items.
You will need:
One 20oz coke bottle cap
One 1/2 inch button
One 7 inch piece of twine
Seven 2 inch circles punched from vellum
or
Five 2 inch circles punched from cardstock.
Pierce two holes in bottle cap using the instructions found in this post:
Step 1.Thread needle with twine and set aside.
Step 2. Place button in the center of first circle and pierce holes for the twine.
Step 2. Stack remaining circles and pierce 1/2 inch from the edge.
Step 4. Place first circle on paper piercer and then add remaining circles. Fan out the circles so that they complete a circle around the first circle.
Step 5. Hold circles firmly, remove paper piercer.
Step 6. Run needle and twine through bottle cap, circles, and button so that button will be inside the cap when the twine is pulled tight. Run twine back down through second button hole, circles, and bottle cap.
Step 7. Press button into bottle cap and tie tightly with two knots. Leave twine ends for attaching flower to project.
Step 8. Fold circles down around the bottle cap to resemble a flower.
Step 9. Attach to project by piercing corresponding holes in cardstock and tie twine ends. After attaching use a little hot glue to hold the bottle cap firmly to the page.
As you can see this tutorial was originally written for vellum. Patterned paper is much thicker and fewer circles will fit inside the bottle cap. The process is the same and yields a classy flower.
Scrap On!
~charity~
As you can see this tutorial was originally written for vellum. Patterned paper is much thicker and fewer circles will fit inside the bottle cap. The process is the same and yields a classy flower.
Scrap On!
~charity~
Subscribe to:
Posts (Atom)


.jpg)
.jpg)

.jpg)


