We are just 2 days away from the start of our "Moody Moody May Day Crop"!! We hope you are getting prepared to join us in all the fun challenges, games and prizes. To help you be ready, we wanted to go ahead and give you a bit of a preview of what to expect. We want you to "get out your mood rings and examine all the colors you see." You will want to have plenty of those colors in your stash for this crop. Our challenges, beginning at 6 PM on Friday night and continue through 6 PM on Saturday night, will involve the following colors:
-orange
-blue
-white
-purple
-red
-black
-green
-yellow
-brown/kraft
Also, check out the moods in that ring as well. Your layouts may be required to have an associated theme. Gather pictures and your thoughts that may include some of the following themes:
-adventure
-sad/difficult times
-royalty
-love/relationships
-birthday/family celebrations
-guilty pleasures
Other supplies you may need include:
-crayons
-a lighter
-white tissue paper
-glue stick/mod podge
-stamps
-paper scraps
-Solid colored Cardstock
-Patterned Papers
More information will be posted in the Moody Moody May Day Crop Forum as we get closer to Friday and the start of our crop! We hope you are getting as excited about this as we are getting ready for it.
Wednesday, April 28, 2010
Wednesday, April 21, 2010
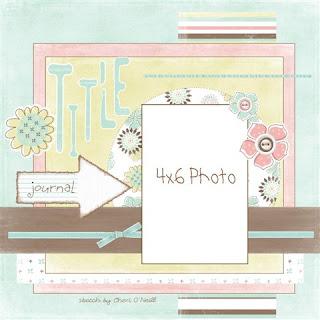
April Let's Scrap Sketch Challenge
 Have fun playing with this awesome sketch from Let's Scrap ...totally diggin' all the layers!!!! Link to Let's Scrap here
 You have a chances to win gift certificates to the MS store. If you complete a layout using this sketch and post it in the gallery and above thread, your name will be entered for a $10 gift certificate to the store.Wow! How about that for exciting! Deadline is Friday, April 30th at midnight.
We hope you enjoy working with this sketch as much as we did. We will do this again the third Wednesday of every month in the future!
Tuesday, April 20, 2010
Weekly Design Team Challenge--Altered Pre-Made Embellishments
I have quite a collection of embellishments that are already premade. They are quite good timesavers when you are trying to crank out some layouts! But sometimes you would love to use the embellishment on your layout, except it has a saying that doesn't work with your photos or it has a themed icon, and it doesn't match the rest of your layout. So what's a girl to do? Make it work for you...and alter the crud out of it!! :) My challenge to you this week is to use those pre-made and themed embellishments you have been hoarding and alter them to fit your projects!
One of my favorite ways to alter sticker type embellishments that have sayings is to cover those words with words that work for my project. Here's a great example...this is the sticker before I started altering it. I wanted to use it on a layout about my daughter, and the "sister" saying wouldn't have worked for this project.
These pictures show a little more detail of how I used my new printed journaling strips to alter my stickers. These first two pictures were taken before I added the ink to the edges. The third picture below was taken after I finished altering the top sticker.
These pictures show the alteration steps for the bottom sticker following the same basic steps.
Here is the finished layout...I added some lace along the bottom of the layout and also used the same edge distresser tool to rough up the edges of the pattern papers. I used some ribbon along the middle of the strip towards the bottom. Then I added some pearl brads and the coordinating iCandy brads from the same BoBunny collection along with a tiny label sticker for the date.
I love how quickly this layout came together and how it looks like I spent a long time making those embellishments when they were just pre-printed flat stickers. :) I also really like the pop of white along the distressed edges and how it ties in with the white in my photos and the lace.
Supplies used on this layout:
BoBunny Sophie Paper collection (Sophie Silhouette)
BoBunny Jazmyne Cardstock stickers (Pretty Sisters)
BoBunny iCandy Brads (Sophie Line)
K&Co Pearl Brads
Making Memories Funky Vintage Ribbon
Lace
Printer and Curlz Font
Ranger Walnut Stain Ink Pad & Sponge
Scrap cream cardstock
7Gypsies Label Sticker
Brown cardstock
Heidi Swapp Edge Distresser Tool
Foam Tape
Looking forward to seeing your projects for this challenge...be sure to post them over in the Memorable Seasons gallery!
One of my favorite ways to alter sticker type embellishments that have sayings is to cover those words with words that work for my project. Here's a great example...this is the sticker before I started altering it. I wanted to use it on a layout about my daughter, and the "sister" saying wouldn't have worked for this project.
So I started the altering process by sanding the edges with my Heidi Swapp edge distresser tool. If you don't have one of these cool tools, you can also use the edge of a sharp pair of scissors to rough up the edges of your paper or sticker. I also ended up adding some baby powder to the back of the sticker so it was easier to work with and it didn't stick to everything and I was able to alter it. I added some adhesive to it at the end when I was finished.
I really liked how the saying was printed onto the sticker itself with strips of inked words, so I did the same thing and printed my saying onto some scrap cream card stock using my printer. Then I cut the words down into smaller strips and inked the edges with my Walnut Stain ink pad and a sponge.These pictures show a little more detail of how I used my new printed journaling strips to alter my stickers. These first two pictures were taken before I added the ink to the edges. The third picture below was taken after I finished altering the top sticker.
These pictures show the alteration steps for the bottom sticker following the same basic steps.
Here is the finished layout...I added some lace along the bottom of the layout and also used the same edge distresser tool to rough up the edges of the pattern papers. I used some ribbon along the middle of the strip towards the bottom. Then I added some pearl brads and the coordinating iCandy brads from the same BoBunny collection along with a tiny label sticker for the date.
I love how quickly this layout came together and how it looks like I spent a long time making those embellishments when they were just pre-printed flat stickers. :) I also really like the pop of white along the distressed edges and how it ties in with the white in my photos and the lace.
Supplies used on this layout:
BoBunny Sophie Paper collection (Sophie Silhouette)
BoBunny Jazmyne Cardstock stickers (Pretty Sisters)
BoBunny iCandy Brads (Sophie Line)
K&Co Pearl Brads
Making Memories Funky Vintage Ribbon
Lace
Printer and Curlz Font
Ranger Walnut Stain Ink Pad & Sponge
Scrap cream cardstock
7Gypsies Label Sticker
Brown cardstock
Heidi Swapp Edge Distresser Tool
Foam Tape
Looking forward to seeing your projects for this challenge...be sure to post them over in the Memorable Seasons gallery!
Tuesday, April 13, 2010
Spring cleaning!
It is that glorious (read:depressing) time of year when we all have a wee bit of spring cleaning to do. Or... if you are like me, you have a mass of coats that overflowed the coat hooks and are still parked on the spare bed where you threw them in February, and the children are wondering if they own summer clothes since the thought of changing them out makes you cringe, and best of all, your scrap space looks like you have the scrapbookers version of "Hoarders" going on.
 It is all about keeping the "stuff" off your page. Details for the challenge are HERE. Hope you can play along and even get some spring cleaning of your own done! :)
Well... it is time my friends. Haul out the trash bags, the clothes bins and the priority boxes. Yep, you read that right. Priority Boxes. Purge that scrap space, then fill up a priority box with all the excess. Why a priority box?? Well, because if gives you options...
*send that box to your kids art teacher
*mail that box to a friend who scraps (please note, using this method you may receive the goods back at some point when said friend purges her own scrap stuff. It is a minor glitch in the scrap circle of life. Apologies.)
*have RAK on your blog or favorite message board. (that should be Memorable Seasons!)
*sell that stuff on craigslist or ebay (proceeds from the sale can buy, well... more scrap stuff! heehee)
The point is, cleaning up your space makes it easy to work in, and cleaning out helps you discover some fun things you may have forgot you had! After cleaning around the house a bit, I was inspired to do this week's challenge as an ode to the clean up and purge. Ok, truth is, I know I have ordered so many new CHA goodies from Jill, if I don't use up and clean up I will have no where to put them! Anyhoo, here is the challenge for this week:
The Minimalist:

Saturday, April 10, 2010
Time to choose May Guest Design Team Member
Short window of opportunity here. Let us see your interpretation of this quote.
It is totally up to you how you interpret. Use the quote literally. Use it as a jump start. Do whatever you want. You can do a layout, a card, an altered item. Like I said, it is up to you. Post it in the gallery and link it here by April 30 and we will choose by May 5.
"There will come a time when you believe everything is finished.
That will be the beginning."
Louis L'Amour
It is totally up to you how you interpret. Use the quote literally. Use it as a jump start. Do whatever you want. You can do a layout, a card, an altered item. Like I said, it is up to you. Post it in the gallery and link it here by April 30 and we will choose by May 5.
Tuesday, April 6, 2010
White Text
I have been on a quest for the perfect white pen for quite a while. I still haven't found the perfect one but I am hopeful. However, there is a white to add white text to your layout or card if you don't have one. The method I find the easiest is with a text box.
I found this tutorial and try as I might, I could not get blogger to let me copy it here. Here is the link.
http://wiki.bhgscrapbooksetc.com/page/How-To+Print+White+Text
I found this tutorial and try as I might, I could not get blogger to let me copy it here. Here is the link.
http://wiki.bhgscrapbooksetc.com/page/How-To+Print+White+Text
Subscribe to:
Comments (Atom)


