I'm going to talk about bokeh and Christmas tree lights. This is what we are going to try to achieve.
The picture above was done using my Nikon D90 and a 35 mm 1.8 lens. My settings were
ISO 200
Shutter speed 1/80
F-stop 1.8
and I used my flash
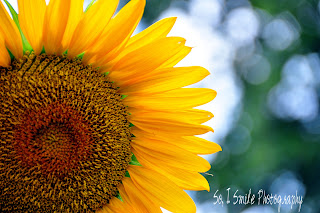
Here is an example of a non Christmas photo with a bokeh background. The sunlight spots coming through the tree leaves created the points of light.
Now, I told you you can do this with a point and shoot and here is my example. This one was done using my Sony point and shoot set to auto with the flash on.
and here is one with the flash turned off using the portrait setting on my point and shoot.
In this one with the flash turned off, I have the lights on in the dining room behind me but the lights in the living room are off in all three pictures. The secret to all three pictures is distance. There must be some distance between the subject (Santa) and the background (the tree) and also some distance between the camera and the subject. The distance between the camera and the subject is not as important with your DSLR if you have a fast lens but it is very important using your point and shoot or with a slower DSLR lens.
Here is a very bad picture of my set up where you can see the stuff piled up by the wall that I haven't dealt with, yet.
However, you can sort of see that there is about 8 feet between Santa and the tree and about 6 feet between Santa and my tripod. The tripod is very important. With the lights off there is a very high probability of camera shake and out of focus shots. If you do not have a tripod, use a table or a chair or something hard to steady your camera on. Another trick is to use the self timer on your camera so it has time to stop shaking before the shot is taken after your press the shutter.
If you are using a DSLR, turn that dial to manual. I know it's scary but you can do it! If you are using a telephoto lens, zoom it out as far as you can and then back away from your subject until you have them framed like you want in the viewfinder and still in focus. Set your aperture as large as it will get. (the smallest number) If you are not using a flash, set your ISO as high as you can and then adjust your shutter speed to get the proper exposure. Focus on your subject and take the picture. The background should have lovely circles of light. You can also try using aperture priority with the lens as wide open as you can get. In aperture priority, your camera will automatically set your shutter speed for you.
If you are using a point and shoot, the same instructions apply to your lens. Zoom it out as far as it will go and back up until you have your subject framed the way you want and in focus. Experiment with it. Try with and without your flash. Don't worry about your flash lighting up the tree. Most flashes only reach about 8-10 feet and whatever is beyond that will be black. Since your subject is 8 feet in front of your tree, only your subject will be lit. The further away the lights are, the bigger the circles will be. Try it on auto. Try it on the portrait setting. (usually a girl with parentheses around her head on your dial) Try it on macro (usually a flower) Both of these settings are good for throwing your background out of focus.If you just want a picture of the tree with lots of bokeh circles, twist your lens until it is out of focus. That will create the circles for you, too.
I hope these instructions are simple enough for you to understand and I hope that you will try it. Remember that your subject needs to be very still in these pictures or you will get motion blur. Here are a couple more bokeh shots for you to see. I had very cooperative subjects.

I hope you will try this little trick and share your results with me.


1 comment:
Oh wow! This is so cool! I figured I needed a fancy SLR with a special lens to get this effect! But, I can do it with my point and shoot! Thank you for sharing this technique, Detta! I'm off to give it a try!
Merry Christmas!
Post a Comment